- »
- Products »
- X-Kar »
- SMT Rework/Repair Systems and Accessories »
- BGA Re-Balling and Fluxing Systems
BGA Re-Balling and Fluxing Systems
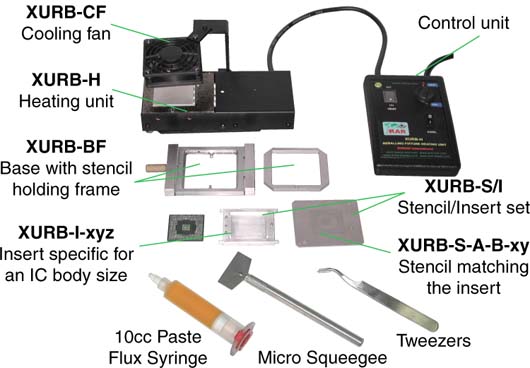
XURB-H Heating Unit with XURB-CF cooling fan
The XURB-S set has is an independent heating system, a Hot Plate XURB-H matching the re-balling fixture.
This heating method allows for reflow of re-balled IC in approximately 2 min., which is 2 to 3 times faster and better than on any other heating system.
Specifically designed for XURB, the XURB-H unit has temperature controller with closed loop feedback, which guarantees proper heating rate and maximum temperature limit preventing re-balled component damage.
It also includes cooling fan, like no other unit in the industry to speed-up re-balling time and make better quality solder balls.
| P/N Stencil/Insert set Component Information |
P/N Stencil Component pattern |
P/N Insert |
| XURB-S/I-156-1-15-1.2
Component Information |
XURB-S-156-1-15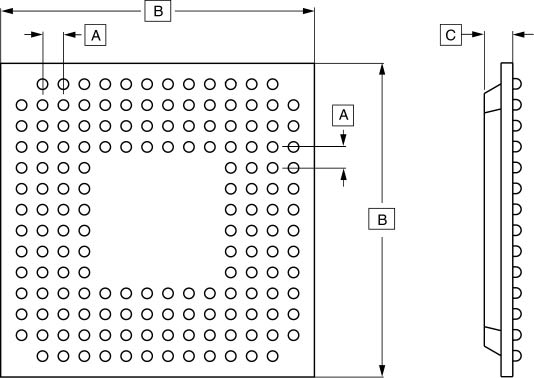 A = 1.0 mm; B = 15 mm; C = 1.2 mm |
XURB-I-15-1.2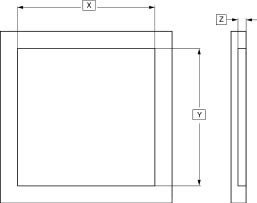 X = 15 mm; Y = 15 mm; Z = 1.2 mm |
| XURB-S/I-456-1-23-1.6
Component Information |
XURB-S-456-1-23 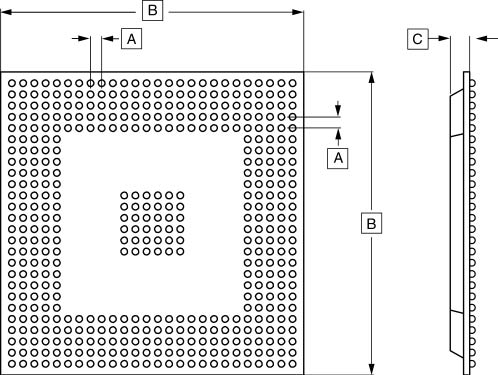 A = 1.0 mm; B = 23 mm; C = 1.6 mm |
XURB-I-23-1.6 X = 23 mm; Y = 23 mm; Z = 1.6 mm |
| XURB-S/I-324-1.27-27-1.6
Component Information |
XURB-S-324-1.27-27 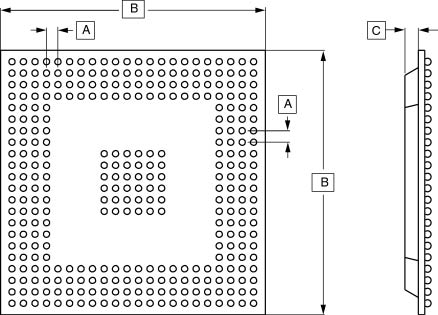 A = 1.27 mm; B = 27 mm; C = 1.6 mm |
XURB-I-27-1.6 X = 27 mm; Y = 27 mm; Z = 1.6 mm |
| XURB-S/I-352-1.27-27-1.6
Component Information |
XURB-S-352-1.27-27 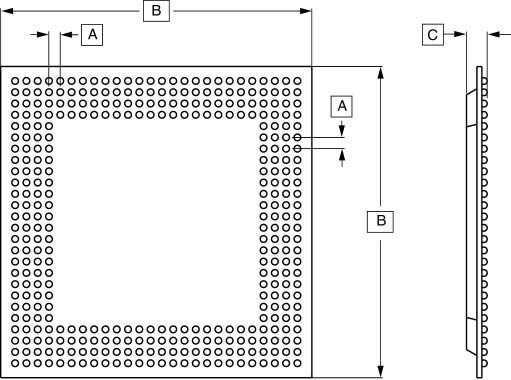 A = 1.27 mm; B = 27 mm; C = 1.6 mm |
XURB-I-27-1.6 X = 27 mm; Y = 27 mm; Z = 1.6 mm |
| XURB-S/I-696-1-31-1.8
Component Information |
XURB-S-696-1-31 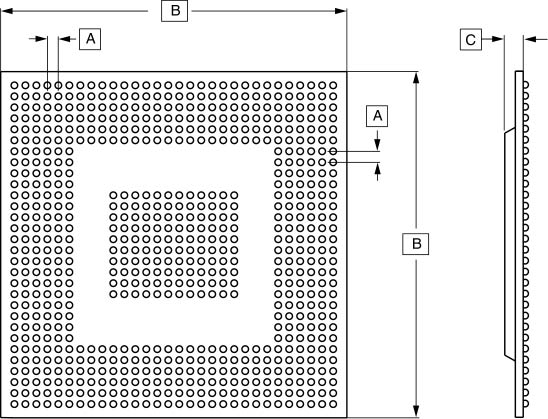 A = 1 mm; B = 31 mm; C = 1.8 mm |
XURB-I-31-1.8 X = 31 mm; Y = 31 mm; Z = 1.8 mm |
| XURB-S/I-388-1.27-35-1.8
Component Information |
XURB-S-388-1.27-35 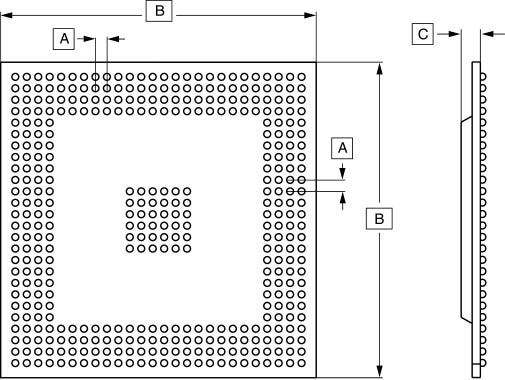 A = 1.27 mm; B = 35 mm; C = 1.8 mm |
XURB-I-35-1.8 X = 35 mm; Y = 35 mm; Z = 1.8 mm |
| XURB-S/I-456-1.27-35-1.8
Component Information |
XURB-S-456-1.27-35 A = 1.27 mm; B = 35 mm; C = 1.8 mm |
XURB-I-35-1.8 X = 35 mm; Y = 35 mm; Z = 1.8 mm |
| XURB-S/I-492-1.27-35-1.8
Component Information |
XURB-S-492-1.27-35 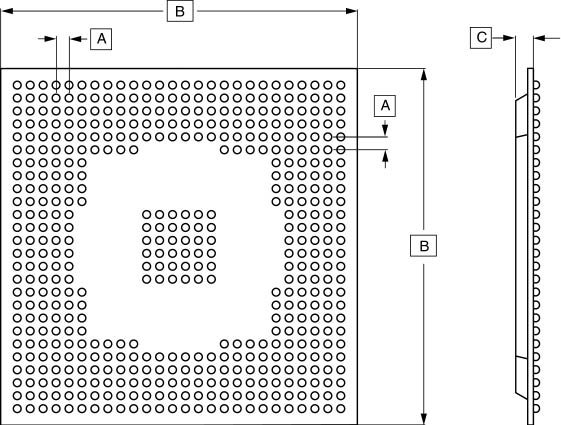 A = 1.27 mm; B = 35 mm; C = 1.8 mm |
XURB-I-35-1.8 X = 35 mm; Y = 35 mm; Z = 1.8 mm |
| XURB-S/I-596-1.27-35-1.8
Component Information |
XURB-S-596-1.27-35 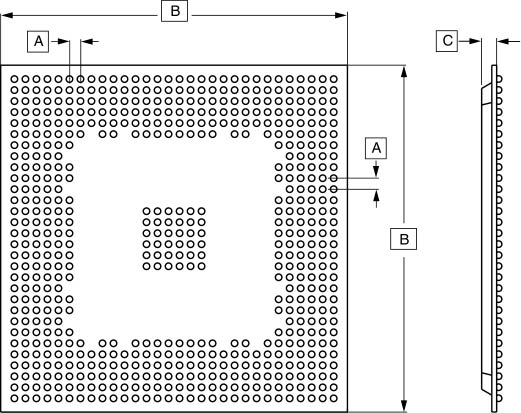 A = 1.27 mm; B = 35 mm; C = 1.8 mm |
XURB-I-35-1.8 X = 35 mm; Y = 35 mm; Z = 1.8 mm |
| XURB-S/I-676-1.27-37.5-1.8
Component Information |
XURB-S-676-1.27-37.5 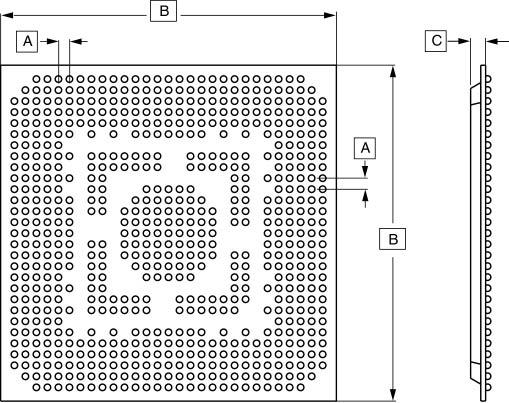 A = 1.27 mm; B = 37.5 mm; C = 1.8 mm |
XURB-I-37.-1.8 X = 37.5mm; Y = 37.5mm; Z = 1.8mm |
| XURB-S/I-432-1.27-40-1.6
Component Information |
XURB-S-432-1.27-40 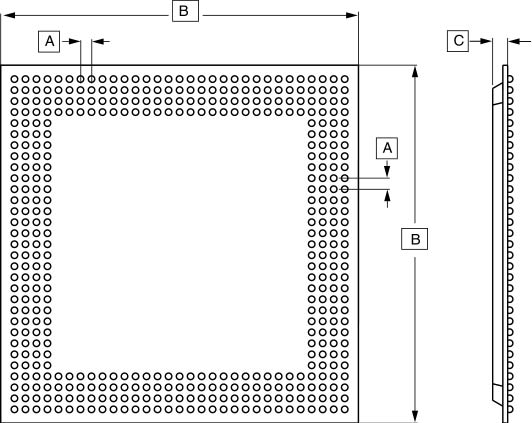 A = 1.27 mm; B = 40 mm; C = 1.6 mm |
XURB-I-40-1.6 X = 40 mm; Y = 40 mm; Z = 1.6 mm |
| XURB-S/I-69-0.8-11x8-1
Component Information |
XURB-S-69-0.8-11x8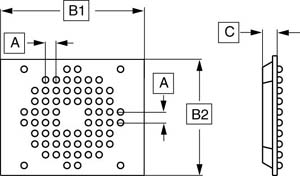 A = 0.8 mm; B1 = 11 mm; B2 = 8 mm; C = 1.6 mm |
XURB-I-11x8-1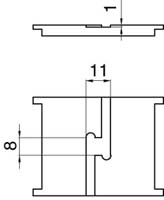 |
| XURB-S/I-208-0.8-15-1.2
Component Information |
XURB-S-208-0.8-15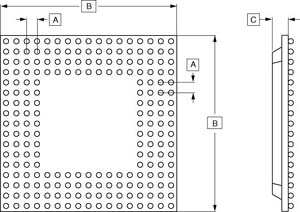 A = 0.8 mm; B = 15 mm; C = 1.2 mm |
XURB-I-15-1.2 X = 15 mm; Y = 15 mm; Z = 1.2 mm |
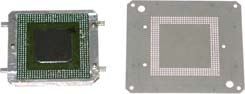
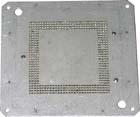
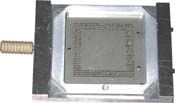
How to use the Re-balling Set
|
|
|
|
|
|
|
|
|
|